|
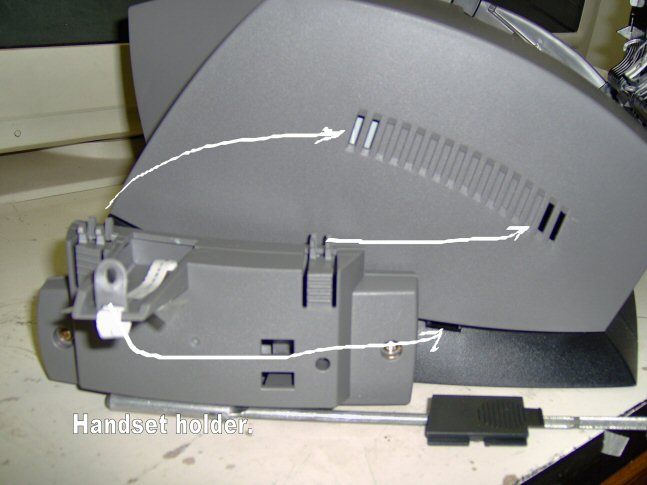
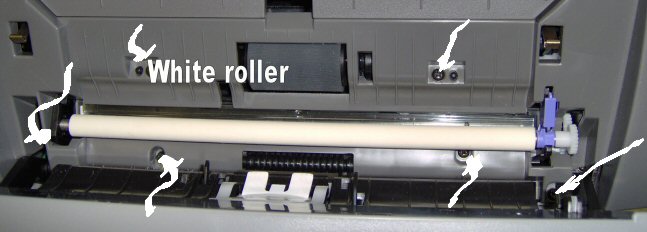
Intro Even though I don't own one of these, I was involved in the repair of one. Due to the info I have acquired on the Net I felt that I should reciprocate and provide some more. There were a lot of people having problems with this printer. Cartridge Carrier Stuck This one gets interesting. The cartridges can get stuck under the cover over on the right side for a couple of reasons... or more. Most, if not all, of them will involve removing the top cover. This looked simple at first and will be AFTER you understand what is needed. From the Net and experience these are my findings. The network location was: FixYourOwnPrinter and the good guy who initially helped me was named Bill. In the first case, where the ink cartridge is loose, you may be able to get your finger inside the cover and push the cartridge back into the locked position. But I doubt it. Anyway it is worth a college try. Now, when you look at the printer it doesn't seem to difficult to remove the cover. There are eight screws. Two in the back and six in the front under the control panel. It would behoove you to have a magnetic tipped screwdriver or a magnet of some kind to help rescue the screws. Just a little hint. There is also a thin ribbon cable and a screw on the handset portion that needs to be removed. If you look at the bottom you will see a small section that can slide and be removed. Under it is the ribbon for the handset and under the ribbon is the screw. The handset holder has two catches under it that you push on and then tilt pull on the handset holder. There is a part that extends into the body with a screw hole down at the bottom. Be careful you don't break it... or the ribbon cable. they both fit in the same hole. You will also need to remove the white roller. It has a purple lever/latch on the right side. Gently pull that back and then slide the roller out to the right. (assuming you are facing the printer) Now then, once you have all the screws out the cover is still not loose. The plastic has edges that catch and make it feel like there is more to remove. There isn't. I had to use a plastic screw driver to wiggle in between the grey and black plastic along the top of the printer. It is pretty rugged but it will come apart without breaking if you are firm but careful.
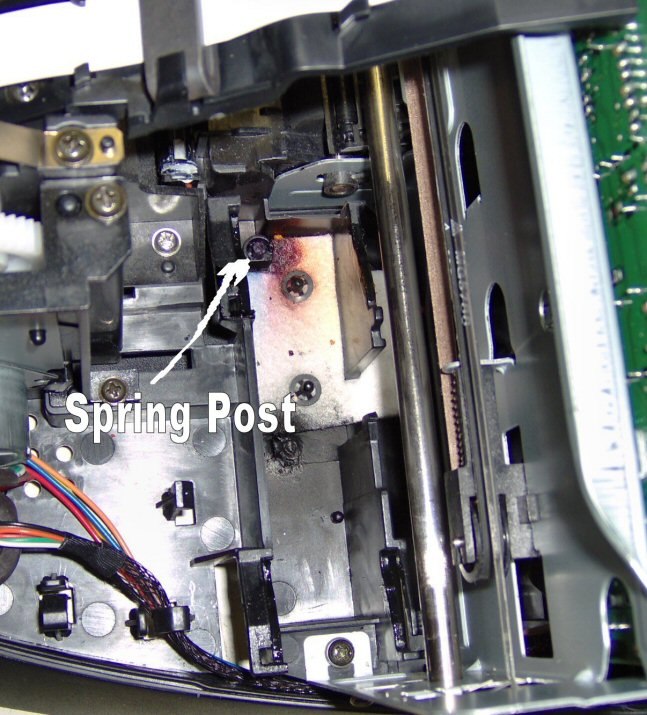
Now words from Bill: Now then, I changed his fix a little bit. I used a soldering iron to gently create a lip on the side of the post. It was enough to hold the spring but still let me put it on. The landing pad is removable if you are careful. The actuation arm can be tied on with a piece of thread so it stays and then the spring attached and pulled out as you are replacing the landing pad. Then you use a spring hook and plastic screw driver to re-hook the spring to the post. It is a messy operation. This image shows the handset removed and the slots where it reconnects. In this image we see the roller that must be removed and the six screws. Two more are on the
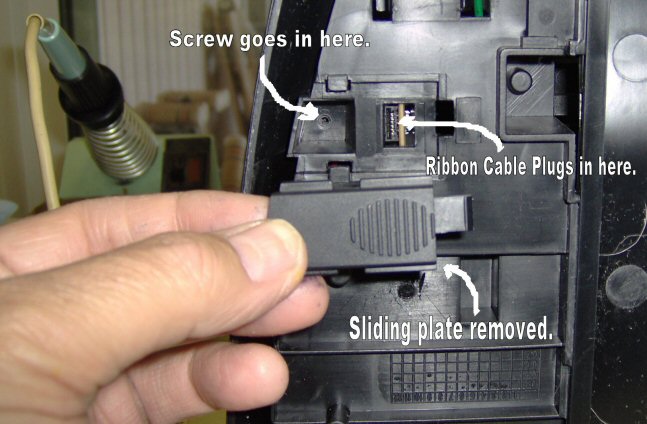
backside of the printer. This shows the bottom of the printer with the cover plate for the phone connection removed. It just
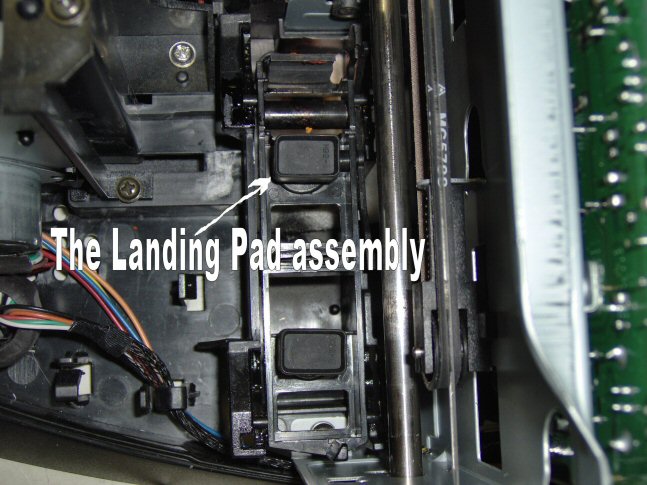
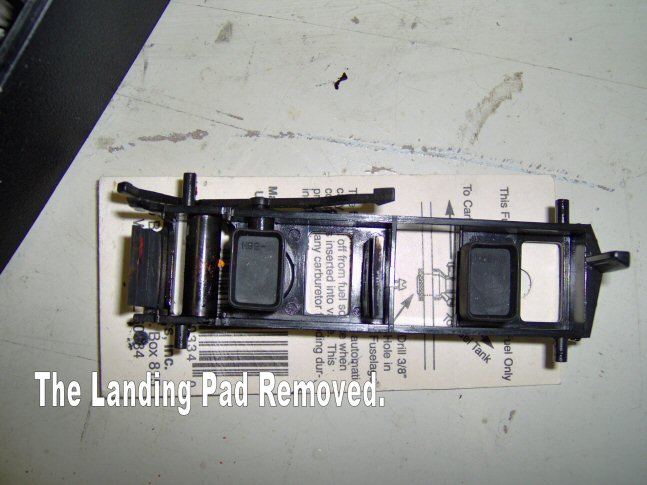
slides to the outside and lifts off. Then you gently pull the ribbon cable out and under it is a screw that must be removed. This show the landing pad installed. You can gently push to the outside and lift the pad out. Move it
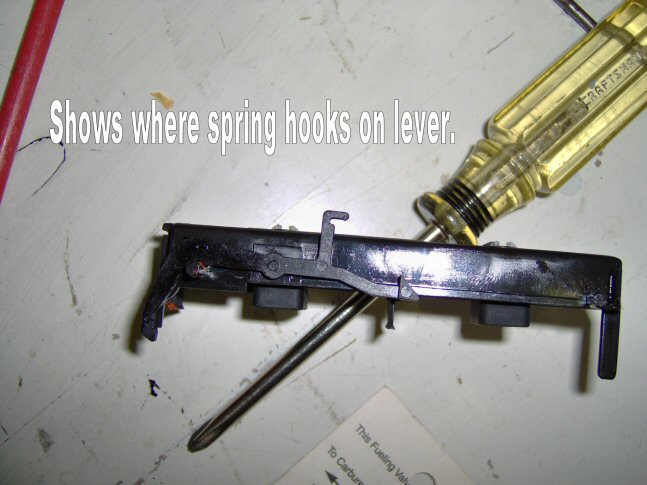
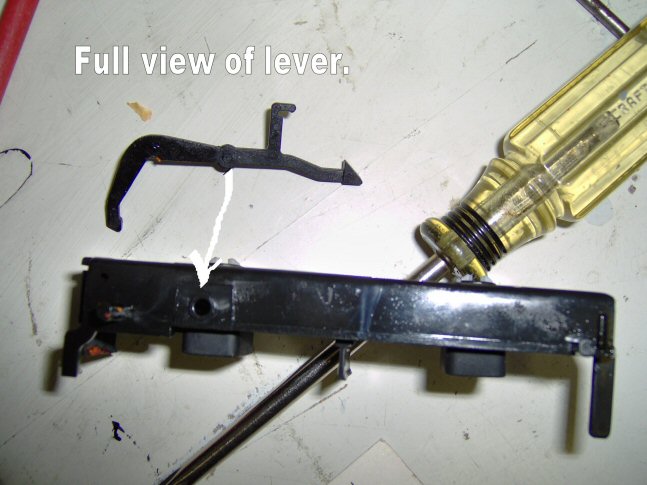
back and forth and you will see how it is installed. This shows the landing pad with the arm attached. This side view shows the hook on the control arm for the spring. This one is just a clean shot of both pieces of the landing pad. This is the no lip spring post. Not sure how it stayed on in the first place. Anyway,
this post is the one that you need to flare over so that the spring stays. Carefully.
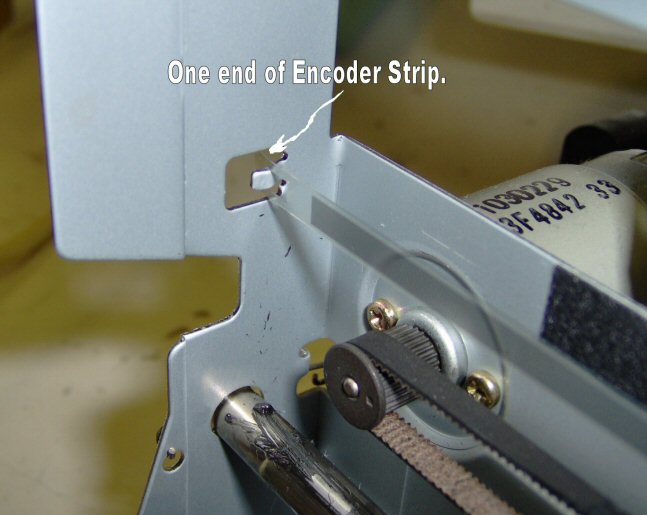
Encoder Strip The following two shots show how the ends of the encoder strip are connected. I found a slot on the
back of the ink cartridge carriage and slid the ribbon through it. I could not get a picture of it but if you look with a
flashlight you can see the slot. I didn't know whether there was a difference on which end went where or which side faced
front. I just installed it. It worked. I was either very lucky or it didn't make any difference. Ummmmm... I did clean it.
???
|